How to Activate Checks in The Desktop Software
Activating Checks
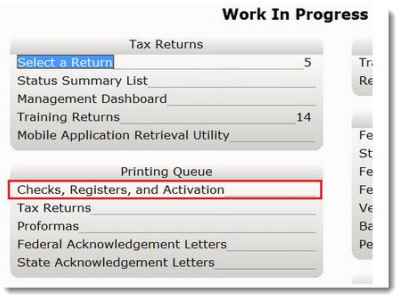
Prior to printing live checks in the desktop software, the check range must be activated. During communications, Central Site will send a list of checks that have been authorized by your bank to be disbursed. The number next to Checks, Registers, and Activation will show how many checks are authorized and ready to be printed.
To activate checks, refer to the following steps below:
- From the Work In Progress screen, in the Printing Queue panel, click Checks, Registers and Activation.  Â
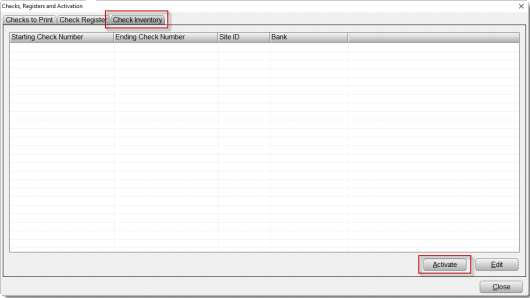
- Click the Check Inventory Tab and then click the Activate Button. The Activate Check Range window will appear.Â
- In the Activate Check Range window, select the appropriate bank from the RAC Bank drop down.Â
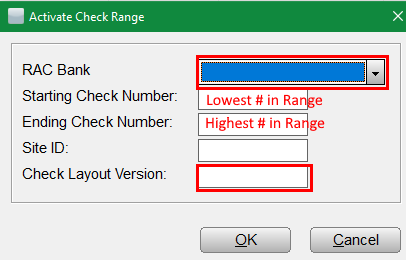
- In the Starting Check Number field, type the lowest check number that appears on the checks.
- In the Ending Check Number field, type the highest check number that appears on the checks.
- For TPG customers, a Check Layout Version can be found on the check stock (near the perforation of the check).
- Click OK to activate the check range. The activated check range will display on the Check Inventory Tab.

- Â To edit the activated check range, select the desired check range and then click the Edit Button. The Edit Check Range window will display.
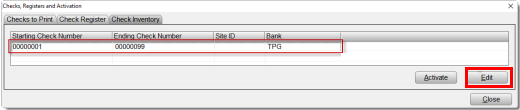
- In the Edit Check Range window, make necessary changes to the check numbers and then click OK.
Article ID: 575
Created: Tue, Feb 14, 2017
Last Updated: Mon, Nov 8, 2021
Online URL: //kb.erosupport.com/article-575.html