How to Edit an Existing Check Range in the 1040 Software
How to Edit an Existing Check Range in the 1040 Software
When there is an error to the check range entered to the program follow steps to edit that data.
- Log into the 1040 Software with appropriate rights.
- From the Work in Progress Navigate to Checks, Registers, and Activation under the Printing Queue.
- Click on the Check Inventory tab.
- Highlight the incorrect check range.

- Select the Edit button.
- Make correction within the Edit Check Range window.
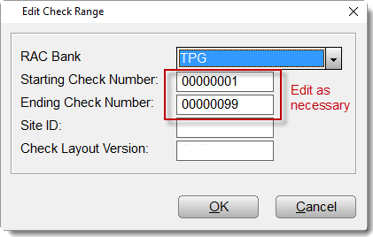
- Click the OK button to save changes made.
Article ID: 586
Created: Fri, Feb 17, 2017
Last Updated: Thu, Mar 16, 2023
Online URL: //kb.erosupport.com/article-586.html